I have had this project bookmarked for over a year! When The Glamourai did this amazing scarf dress DIY, I knew that one day I would replicate it. For more than a year I had been searching and searching for the perfect scarves, so when my sweet friends at Accessorize offered to send me some accessories, I immediately asked for two big scarves so I could do Kelly's DIY.
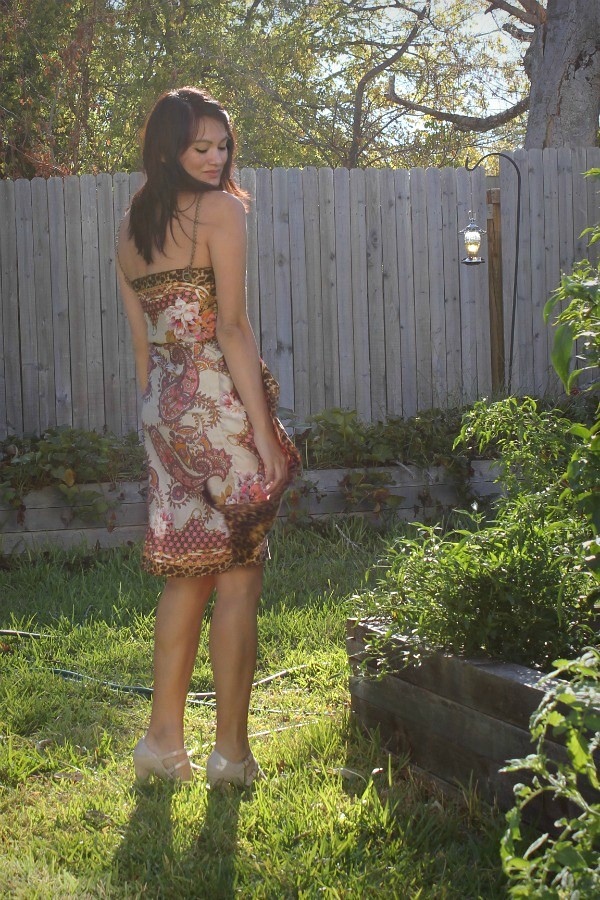
I wore it
a few weeks back at the
Crave launch. It turned out great and this is easily one of my favorite dresses now:
 Please see The Glamourai's instructions here. The following are my own specifics just in case you want to try it, too!
To start, you'll need some stuff:
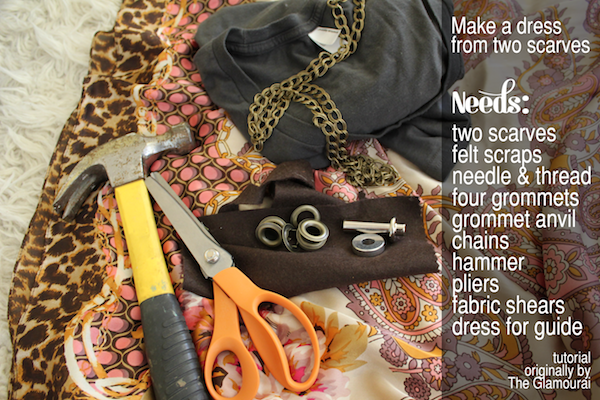
The scarves I used were 35'' square, 100% silk, and were identical. The
grommets I used were 7/16''.
Step one: sew.
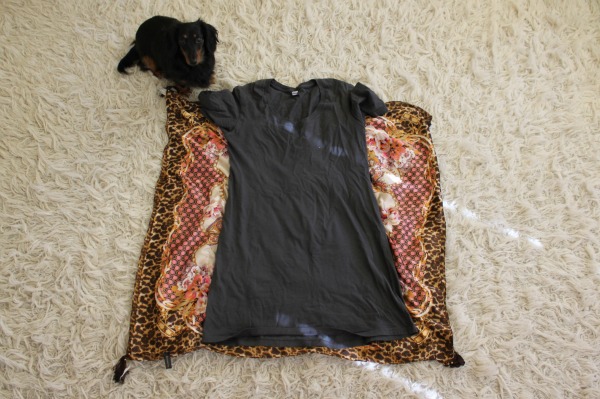
I used a comfortable fitting dress as a guide. I simply laid my dress on top of the scarves, pinned the scarves together, pinned the dress on top of the scarves, and then used a sewing machine to sew about an inch outside along the sides of the dress (this could be done by hand
much easier!). Make sure to leave extra room because there is no zipper, no stretch, and the finished dress needs to fit over your bust and hips.
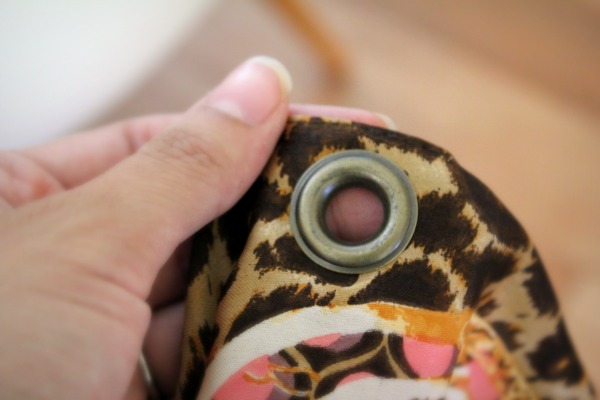
Step two: add the grommets.
I had originally purchased
grommet pliers, but I later found out that grommet pliers are for very small grommets and snaps. I had to go out to buy a
grommet anvil, instead. As you can tell, I had NO IDEA what I was doing. I got the grommet anvil home and was totally clueless. Everything I looked up didn't seem to help, so after some trial and error, I finally figured it out. If you're attempting this project, too, and have never used grommets, here's a guide to the setting tool:
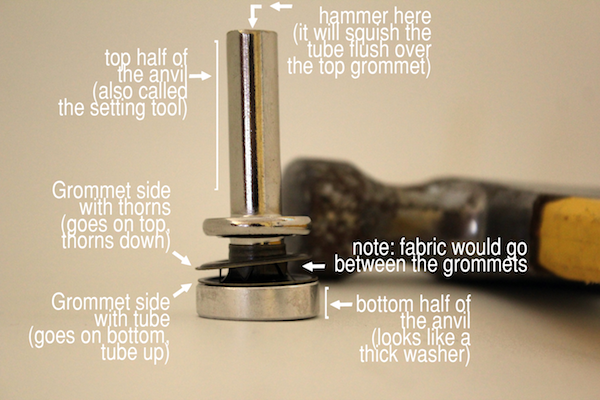
On the back of the package of the anvil, it said that thin fabric had to be at least three layers thick. I remembered from
studding my blazer that things like grommets and studs stay in place better with a little felt backing. Thus, why you need some felt. Cut some little squares that just barely cover the back of the grommet, cut holes in the squares the same size as the grommet holes, and insert the squares behind the scarf (body side). Next, hammer the grommets! Whack 'em hard! I hammered mine outside on the patio. Bang bang bang bang bang bang bang! I recommend adding a towel underneath so your grommets don't get scratched up.
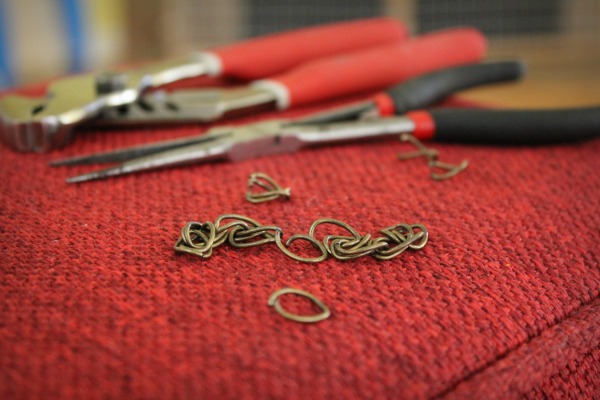
Step three: add the chains.
I don't have a photo of this (sorry!--
Kelly's instructions are spot on) but I will tell you that I thought I could wing it, and I didn't measure. I ended up needing pliers... often. I should have measured how long I wanted the chain straps to be before I started. I kept having to take out links to make it a perfect fit. I have a photo of
that.
Step four: wear the dress.
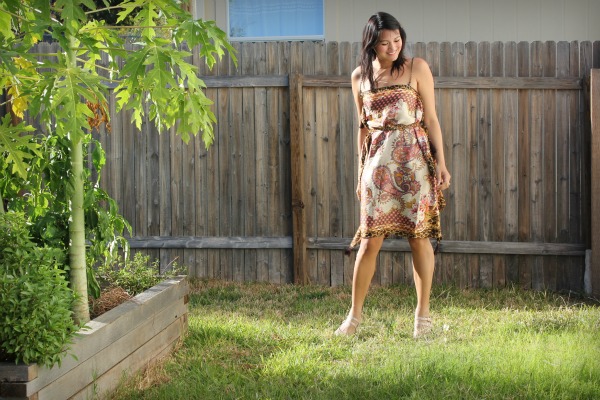 Add a belt if you want to.
Bam! You made a dress out of two scarves. Easy, huh? (Well, once you get past the grommetting).
I want to send a huge thanks to The Glamourai for always being such an inspiration and for providing great details on how to do this, and I also want to thank Accessorize for sending me these perfect scarves.
More photos of this dress here. If you end up making this dress, too, send me a photo. I'd love to see your take on it.